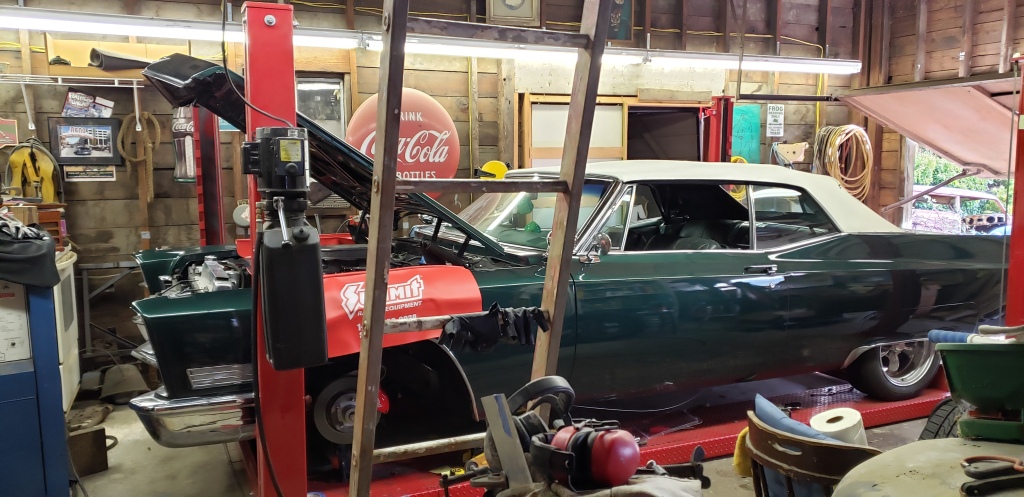
That’s right, its time to stop and the car needs brakes!
I know, I know; the brakes are the most important. They are also expensive to replace, there are not many brake kits for a Cadillac, I’m not a brake expert, and it should stop better because John (the previous owner) converted it to disks right?
Yes, I know; no excuses. (Sigh)
Ok; cause this is a long story, here is the TL;DR (To Long; Didn’t Read)
- Found and purchased a brake kit for the Cadillac! YEAA
- Kit showed up damaged and would require modifying. BOOO
- Had to fight company to refund kit. More BOOO
- Did some research and you can (with the help of some awesome websites) design your own brake kit. This does require some hours of study, but you can do it.
- Ordered the parts, and they just arrived! YEAAA!
- Time to install it! BAM!
Assessment
If your experiencing something like what I have, then your probably in one of a couple buckets
A) Your building a car from scratch and need to plan the brake system
B) You have bought a car where someone installed some random brake components and they don’t work well.
Both scenarios start with the need for you to assess some basic information.
- How much weight is under the rear wheels
- How much weight is under the front wheels
- What is the brake pedal ratio
- What size rotor do you plan to use
- What size caliper do you plan to use
- If the car already has brakes, what is the pressure at the caliper
- If the car already has brakes, what is the booster diaphragm size
- If the car already has brakes, what is the master cylinder bore
I know it sounds daunting, but if you have this information, the rest of it is easy. Similar to other projects, I have spent months trying to blead the brakes enough to make them work right, replaced the master cylinder more than once (original which was leaking) and pulled the booster a couple times. All of the questions could have been answered within an hour with a jack, some hand tools a measuring tape and a pressure gauge from SSBC.
For disk brakes, you need about 1200psi at the caliper with 70 lbs on the brake pedal. I measured 600psi when I put my whole body into it. Naturally, you want to understand what the problem is, but if you have done your homework from above, you would find that this is what the system design was capable of.
I had a pedal ratio of 2.6:1, 11″ single diaphragm booster, 1-1/8″ bore master cylinder and brake calipers that had a piston area of 6.28″. If you do the math, that is about 500psi with 70 lbs. How it got like that is not as important as understanding what the car needs and what will not change.
Picking the parts
We have a 4500lb car with a 2.6:1 pedal ratio and 12″ rotors to stop with 70lbs of force on the brake pedal. Kits are great, but know what’s in them prior to purchasing. I found several big name companies focused on the classic car industry that effectively admitted to selling parts and not owning the engineering behind the parts or kits. Companies like Wilwood, Jamco Suspension and SSBC are great resources and Wilwood is made in the USA!
From experiance, you pay the price for the experts and quality or you pay in time consumed and products that are not what they seem from the discount shops. As my Economics teacher told me, there is no free lunch. If you need more convincing on this, keep reading.
Using BrakePower.com’s online calculator, I plugged in the required variables along with altering the variable for the booster size and found that I could achieve the braking results I wanted by simply upgrading the booster from an 11″ single to a 8″ dual diaphragm. I did opt for a new master cylinder and calipers from Wilwood to assist in brake line routing as their M/C’s allow you to run lines from either side. Normally the M/C only supports left side.
Going the cheap route
Sometimes, the cheap route is going with the experts. Kits may contain everything, but they may also contain stuff you don’t need. They are a one size fits something. (Something that will likely need some drilling, modifying, zip ties, home depot machine screws and duct tape)
Here is an example. I purchased a kit without doing homework for $1400 that I returned. Prior to installation, I would need to disassemble some of the kit to refinish it (sand paper, paint, paint thinner, drill bits, steel for new mounting brackets, the list goes on an on). After doing the homework, I found the parts I needed were much fewer and from better resources for less than $700. I saved half, got better parts and will have a bolt on solution by doing my homework!
| Classic Car Store Kit | Premium Parts | |
| Brake Kit | $1300 + $100 Shipping | |
| Booster | $70 | |
| Master Cylinder | $260 | |
| Brake Calipers | $260 | |
| Proportioning Valve/bracket | $130 | |
| Brake Line & Fittings | $40 | |
| Master Cylinder fittings | $20 | Included with M/C |
| Master Cylinder Blead kit | $15 | Included with M/C |
| Stepper Drill Bit | $30 | Not Needed |
| Paint to refinish scratched caliper | $20 | Not Needed |
| Total | $1400 | $760 |
Planning the install
Changing the position of the Master Cylinder with a new booster means moving the proportioning valve and requiring that I re-run all of the hard brake lines. With that in mind, time to plan the shopping/check list and plan the install process. I’m renting a lift for this and want to ensure I have everything ready.
Shopping/Check List
- Booster
- Master Cylinder
- Proportioning valve & mount
- 2x Brake Calipers
- Brake line
- Fittings
- Self bleading bleader screws (got em)
- Brake Fluid (probably should pick up)
- Empty clean container
Install Process
- Lift the car and remove the front wheels
- Disconnect the brake pedal from the booster
- Remove the old M/C and proportioning valve
- Remove the old booster
- Remove the old brake calipers
- Remove the hard lines from the M/C to the front wheels
- Remove the hard lines from the M/C to the rear flex line
- Prop the brake pedal up so that its in the normal resting position (if it had brakes)
- Measure the distance from the firewall to the pin on the brake pedal where the booster will attach. (might need a small strait edge and a tape to do this)
- Adjust fittings/cut rod on booster so that the booster rod is the right length
- Install the new booster and connect it to the brake pedal
- TEST the brake pedal and make sure it does not bottom out on the floor
- Verify the booster pushrod distance by measuring how far it comes out when the pedal is applied. (quality M/C’s like Wilwood will state the distance the piston should push for full throw)
- Install the new Master Cylinder
- TEST the brake pedal again and make sure that the pedal does not bottom out on the floor
- Bleed the M/C in the car. (I just prefer to do it this way. It works as long as you can push the M/C piston full length)
- Install the proportioning valve
- Install new calipers
- Install new flex lines
- Make and install hard lines between proportioning valve and calipers flex line
- Make and install hard lines between proportioning valve and rear flex line
- Fill and blead system
- Find leaks and blead system again…..
- Find a few more leaks and blead the system one last time.
Installing the new Brake System
Installing the parts pretty much went as planned. I have put new pads in a car, but I have never replaced the entire circuit. We did run into a few bumps along the way; but amazingly the planning paid off.
The only real hiccups we had were the spark plug wires had to be re-routed to clear the new M/C and we had the cut the booster rod way down which seemed a bit sketchy at the time. The reality may be (still not sure) is that this is normal and they just give you extra rod length to ensure you can get the job done.
We also ran into lots of leaks. I think this was simply due to new hard lines and getting them seated took more pressure than anticipated. We had the project done in 2 days with lots of bench racing and to many cooks in the kitchen. I don’t think I would recommend doing it any faster as you will probably start making mistakes. Lastly, I need to thank George. George was kind enough to let us use is amazing garage and lift which though not required made getting around the car much easier. Thanks George!
Oh, last comment. Wow, what a difference. The car stops and it stops like a modern day car. Hope this finds someone who is thinking about doing it and inspires them to pull the trigger. 🙂


